Codespace development
Instead of installing multiple command-line tools and libraries on your local machine, you can use a web-based development environment that comes preconfigured. devcontainers1 using GitHub Codespaces2 provide this capability and allow you to start coding quickly with a consistent, reproducible setup.
Creating a new GitHub Codespace
Creating a new GitHub Codespace
GitHub Codespaces runs a hosted development environment defined by a .devcontainer/devcontainer.json file. In addition to the .devcontainer folder, files such as .envrc, Makefile, and various .ignore files provide helpers that streamline verification, testing, and automation.
A typical repository might look something like this:
.
├── .devcontainer # (1)!
│   ├── devcontainer.json
│   ├── k3d
│   ├── scripts
│   ├── skaffold
│   └── test
├── .dockerignore
├── .envrc
├── .gitattributes
├── .github
│   └── workflows
├── .gitignore
├── .helmignore
├── Dockerfile
├── LICENSE
├── Makefile
├── README.md
├── conf.d
│   └── default.conf
├── docker-compose.yml
├── index.js
├── package.json
├── public
│   ├── favicon.ico
│   └── index.html
└── src
    ├── App.jsx
    ├── assets
    ├── calculators
    ├── components
    ├── helpers
    └── style.css
 Required
To create a codespace
- Open your repository on GitHub and click the green “Code” button.
- Select the Codespaces tab and select the ellipsis () icon.
- Choose New with options....
- (Optional) Select a different machine type for better performance.
- Click “Create codespace”.
Using Codespaces
Finishing setup
When a Codespace launches for the first time, several setup prompts appear in the bottom-right corner. Complete these steps:
1. Allow the direnv extension
This loads required environment variables and configuration.
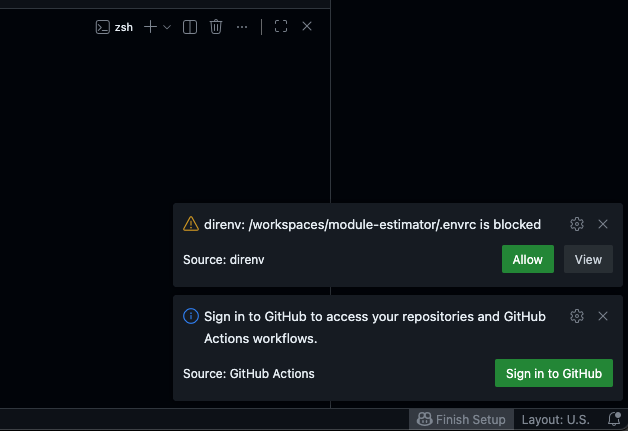
After allowing it, restart the terminal so the environment reloads.
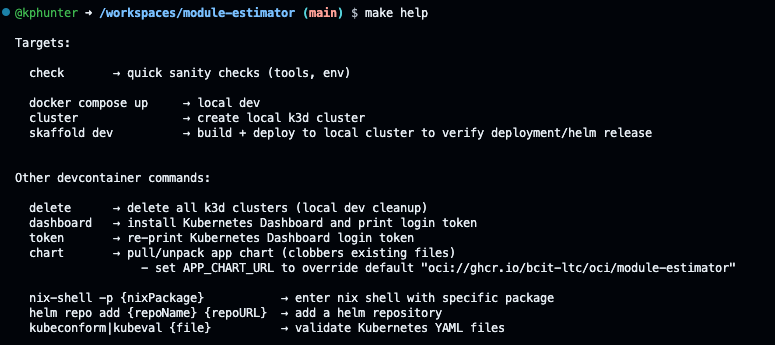
2. Run make help
This lists available helper commands provided by the repository.
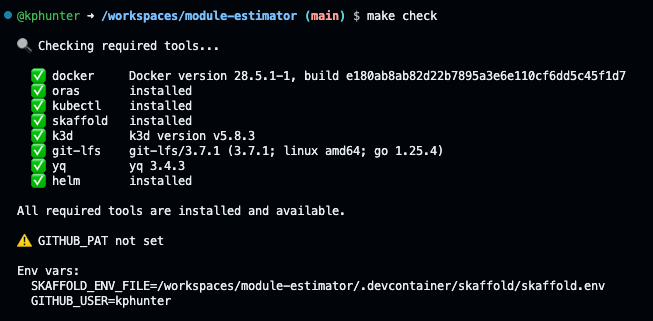
3. Verify readiness make check
This confirms that tools, access, and required dependencies are all configured correctly.
Basic "local" development
Start by running:
docker compose up
Ensure the application builds and runs correctly inside the Codespace container. If anything fails, resolve the issue before continuing.
When the application behaves as expected with this command, move on to deployment testing.
Testing deployment with Skaffold
Containers are deployed to Kubernetes using Helm3 charts, and Codespaces are an excellent environment for testing both chart rendering and whether a Helm chart deploys correctly. These are enabled by Skaffold4.
Helm charts
A Helm chart is a set of templated Kubernetes manifests that can be applied to clusters.
Skaffold
Skaffold is a utility that automates the building and deploying of images.